Wednesday, August 18, 2010

39. I'd Like to Solve the Puzzle, Pat

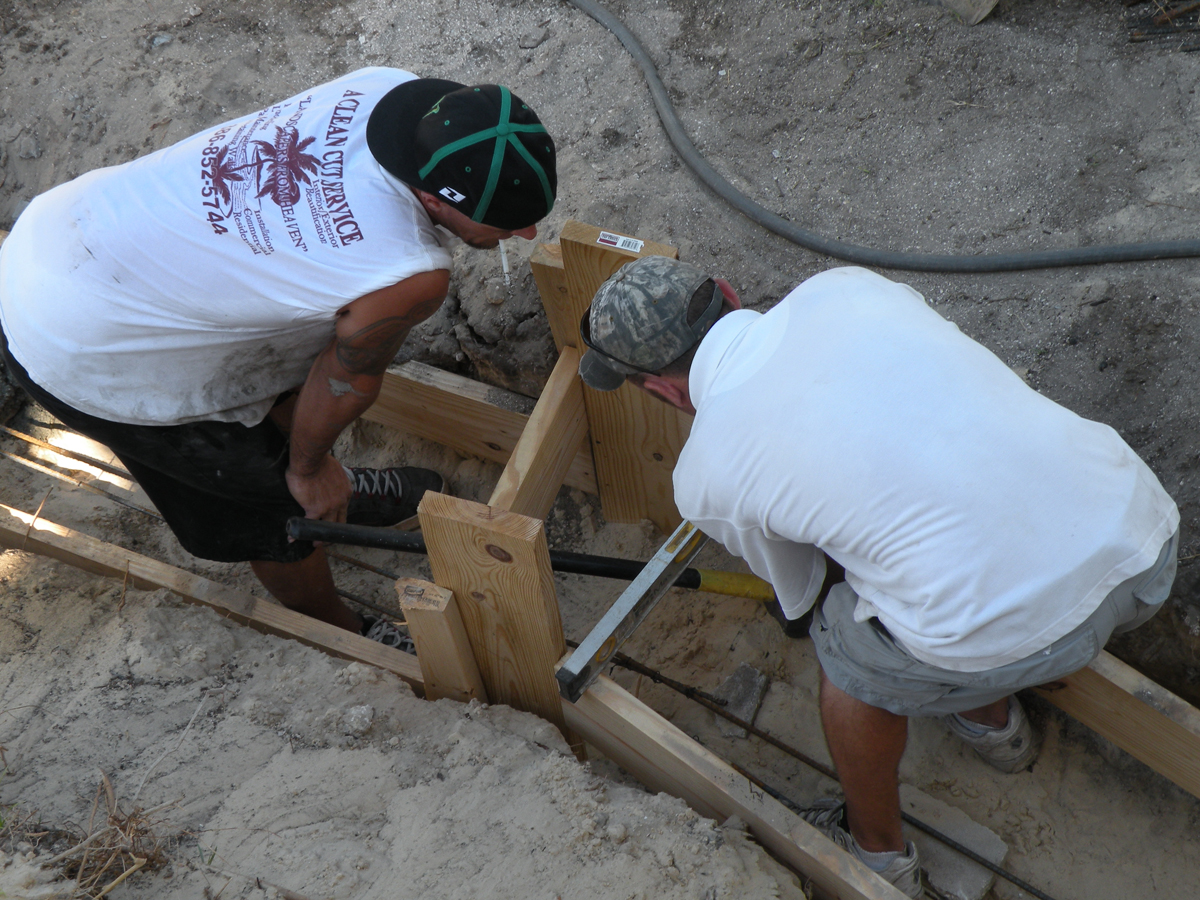
When I arrived this morning, the menfolk were already hard at it.  These guys are nothing if not detail minded - everyone in the neighborhood has commented about what great work they are doing (PS they said the same thing about Rob and Ken - I have some wonderfully talented friends!!).  Here they are forming up the rest of the footer - must make sure everything's level or you are in trouble when it comes to laying the block on top.


Ok, I love power tools, everyone knows that.  Today I was introduced to a new one:  a little electric concrete mixer!  He was so excited to be there to help on the project - can't you tell?  I want one!!!  You throw a bag or two of concrete into it, and as it's mixing around you squirt water in until it's just right, which sure beats mixing it in a wheelbarrow with a hoe.  Then you just dump it right where you want it.


This is the last leg of the footer, all nice and poured.  It has just a little curve to it, like the original that had to be taken out.  If that sandy area to the left looks remarkably like a giant cat box, that's because it is.  I love animals, but I'm really looking forward to having a fence, and the neighborhood kitties taking their tootsie rolls elsewhere.


This is one of the brackets, already cemented into the top (lintel) course of block - one fence post will go in each one.  They will NEVER wiggle or get that sloppy leany look that some fences do.


And here are a couple of the neighborhood inspectors dropping by to see what was done today.  On the left is Mr. Leete, who brought the guys a cold beer.  The left side of the wall you see is actually on his property.  On the right is Cindy, a very nice lady who lives down the street with her husband Randy.  Randy has already baked me a loaf of bread to welcome me to the 'hood.

Now if you think I was inside all day lounging around and reading a book, you'd be wrong.  But how many pictures of switch boxes with wires can I show you?  Today I finished a few in the kitchen and moved  into the living room, in anticipation of Steven and me tearing the siding off the front wall in the morning.  I will have a little re-wiring to do there and wanted to have my ducks in a row before he comes.  I took everything apart and figured out which breaker brings power out there.  I found several things that were wired wrong - some were ungrounded and a few switches were wired completely wrong.  I will eventually have to open up every switch and outlet in the house just to satisfy myself that there are no more like that.

This is a picture of where one of the giant living room ceiling fans was - somebody hung it with TOGGLE BOLTS IN THE DRYWALL!!  Now even the most remedial honey-doer knows that a ceiling fan has to be secure - at least to keep it from wobbling around and falling on your head.  Nothing was holding it up but the wire nuts by the time I got to it.  One wire here is the hot coming in from a junction box, and the other is the wire that goes to the other ceiling fan.  Got 'em capped off now and I will eventually dig around a little up there and install a 2x4 and an appropriate fan box to hang it back up.

Tomorrow Steven and I will concentrate on demo and prepping the front porch for the siding.  I think this will take the better part of the day, so I gave up the idea of doing demo and installation all in one day.  I may have to screw up some plywood over the door hole, but oh well.  Then on Friday or Saturday, I may possibly have a special guest volunteer make an appearance, someone who is skilled in trim work and can help me bang out the siding installation.  I won't mention any names because I don't know if he would like to remain incognito.  If not, you can bet I'll have lots of pictures of us at work - that will be a reeeeally satisfying project to complete!

Monday, August 16, 2010

38. Boys Playing With Blocks

You are in for a treat today:  lots and lots of pictures.  Don and the guys were working on the retaining wall out back, but first let's talk some more about my never-ending wiring project.

Remember the reason I'm showing you all this - to take some of the fear out of it for you, should you want to try this on your own.  Number One rule:  always start by shutting off the breaker.  And, as Jake and Bobbie always remind me - don't believe anyone else has shut it off for you, even your grandma.  Do it yourself.  When I began the work today, I thought I remembered leaving the breaker off the day before.  Oops... I got a little buzz to remind me that I didn't.  But it didn't hurt, and no CPR was required.

Once you've got the breaker off, what harm can you do?  If you wire it wrong, when you turn the breaker back on it will shut off again.   Rule Number Two:  take things one little step at a time.  Just follow the circuit, you can't do the whole thing at once. 

This picture shows what's called a "pigtail" which is a whole bunch of wires all wired up together.  One black wire is the HOT coming into the box.  Another is HOT going to the exterior GFI on the back porch.  You can see that two of the wires are unattached, each will go to it's respective switch, one for the overhead lights as you come into the kitchen, and one for the exterior light.  Once you get all the HOTs in the right place, the rest is easy:  all the whites get pigtailed, and all the grounds get pigtailed.  If there are red wires, that means you have a three-way switch which is two switches for the same fixture.  I don't want to go there right now.

This is everything right before I put the switch plate cover on.  It used to be a "three-gang" with two switches and an outlet, but I eliminated the outlet so the center panel will be a blank.  Good thing, with all that crap I had to shove in there.


This is the cute exterior light I put up - I've had this thing floating around my house (from a yard sale, of course) for years, didn't know what to do with it.  It's already all rusty, ready for the salty air!!


And this... whoopeedoo ... is the exterior GFI outlet.  I will have to replace that box, since I'm going to have a nice watertight outlet cover on top, but I hooked it up to make sure I had the wiring working right.  Switches and outlets are so easy - they come with instructions and you just shove the wires in the back and tighten a screw on each. 


Now on to the exciting part!  This is Don cutting block for the wall.  I didn't realize it until I looked at this picture, but he's actually mitering the corner.


Here we are after some of the progress.  You can see what's left of the original wall on the right.  It's sad, but once they got there, they realized it was leaning too much to use it, so they busted it out along with the foundation and they're going to lay the whole thing fresh.  That corner on the right is where the mitered blocks were used.  It looks really tall, but the yard inside will be level with my bottom step.  I know I'll love it.


Here is one of the guys doing his thing - makes it look easy.  Have you ever tried to get concrete to behave?!  He looks like he could be whistling while he was doing this but he was actually listening to some grungy rock.  It's fine - whatever makes 'em happy. 


Here's a shot towards the end of today.  The wall will tie in with my neighbor, Mr. Leete the architect's wall.  It's actually just inside his property line, but he was cool with it.  Gives me about another foot of width on my little back yard.  He is paying for his part of the wall, but they are all tied together with rebar and concrete will be poured in the top so even if someone backs into it it will be a minor fix.  That wall won't come down again.  My fence posts will be set in brackets right in the concrete on the top of the wall!


Next topic:  These are a couple of doors that came out of the kitchen that I won't be reusing in there.  They are in my studio at home now - I have an idea to make them into headboards for the beds at Grandview.  Maybe give my heat gun a try, and see how much paint I can get off.  I would just sand them a little bit and leave them alone if it was old paint, but somebody primed over them, and never painted the top coat.  Icky.


Last but not least, I have been remiss about logging my thrift- and garage-sale finds for a couple of weeks.  I got a trash can that I'm going to use for recyclables in the kitchen, some storage containers (in Florida EVERYTHING has to be airtight), a space heater for the bathroom on those chilly mornings in my dreams!  Some more curtains, cute plastic dishes, a pizza pan, a pillow and some bubble bath.  On the left is a dog bed given to me by my friend Judy - brand new, totally classy, and FREE!!

Balance Forward:  $245

$32  lots of misc.

Remainder:  $213
Saturday, August 14, 2010

37. Come On In!

Today is Saturday, and nothing went according to plan.  Oh yeah, I forgot - it never does.  Although I didn't take a single picture, I made up for it... please read on.

I had thought that Don and the landscape guys would skip Friday and be there today, but they came Friday and did some work, so they skipped today.  They prepped the forms for the block wall, but since there was a deluge of rain, they'll have to touch it up a little Monday morning before they pour the footer and lay the block.

Also, Steven had wanted to come today to give me a hand with whatever I was working on... but that fell through as well so I shifted gears.

It worked out just fine - I needed a day at Grandview by myself, to straighten up, clean up a little, put some stuff back in order.  Things get messy and discombobulated when there's a lot of work going on and it bugs me when stuff starts piling up in all the wrong places.  I built a rack in the basement for all the gardening tools.   I rearranged some stuff and moved the lumber I'm storing down there, because soon I want to try to park my truck in the left side.  I also straightened up all the work areas - sorted out the electrical tools and took an inventory for what I have left to do.  Swept the floor, cleaned the counter.  Also I closed up that hole in the wall where the stove vent had been so lovingly 'tucked' - it looked like it had been hacked out with a carving knife.  I had a plastic bag stapled over it and was thankful there wasn't a huge puddle in the house when I came in, after that rain storm yesterday.

You can thank my sister for requesting a floor plan which I should have done long ago.  Hopefully this will help you follow the action a little better.  It's not perfect - I have a little trouble figuring out just where the closets start and stop - but it's close enough.


But now, the piece de resistance!  The moment you have been waiting for... or maybe not.  As you watch this, please forgive the narration in doggie talk, but when you spend your whole day talking to a dog I guess that's how you sound.  Anyway, here is your virtual tour!!